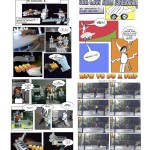
Tip: Working with Photos
To use a photo in your project you need take or find a photo, copy it to your project folder, and insert it into your project. Always give credit to the photographer!
Taking Photos
- Use a digital camera, cell phone or iSight camera.
- Hold the camera steady and make sure you have everything you want in the photo.
- Pay attention to what’s behind your subject. Move to a new spot if needed.
- Take more than one photo to get it right.
- Import your photos to your project folder. You may need a cable or card reader to copy photos from the camera to the computer.
- If you use a smart phone, you may be able to email the photo to yourself, to get it on your computer.
Finding Photos
You can do a web search to find a photo online. Copy down the name of the web site where you found the photo. Save the photo to your project folder. When you use the photo, add the credit for it to the picture
Editing Photos
- Crop and adjust your photo in Preview, iPhoto, Skitch or other image editing software later on. Use
- If you take a picture with PhotoBooth (on a Mac with an iSight camera), you can add lots of special effects.
- You can edit photos using free web tools, too. Links coming soon.
Saving Photos
Save your photo into your project folder. Give it a file name that makes sense.
Using Photos in Your Project
You can usually add your photo to a print project just by dragging it into the document you are making.
Follow our steps to add your photo to a post on our blog.
For more, check out our photography tips on our old site.


Leave a Reply